A 96-well plate run on a GC autosampler came back with naphthalene recoveries at 71% against a 92 to 96% historical band, and the analyst’s first move was to re-run the standards. Standards were fine. The loss was real, and it was happening in the vial: a gravimetric check on six sealed 2 mL vials held at 25 °C for 18 hours showed 2.8 mg average weight loss per vial, against 0.4 mg on a control lot from a different supplier. That gap is septa seal failure, and once you have measured it, evaporation and sample loss stop being a mystery and become a specification problem you can close.
Most labs I visit have never weighed a sealed vial. They assume the cap is on, the septum is intact, and the sample is what the certificate says it is. Then a long overnight run drifts, or a low-boiling analyte disappears, and the investigation goes to the column, the inlet, the detector. The septum is the last thing checked and the first thing that caused it. This piece is about the three physical mechanisms behind that loss (leak paths, poor re-seal after puncture, and compression set) and the one measurement that tells you which one you have.
A crimp or screw cap on a 2 mL vial is a compression joint. It has exactly as many potential leak paths as it has interfaces, and each one fails for a different reason. When I run a leak audit on a failing lot, the distribution is remarkably consistent.
- Septum-to-bore interface (about 45% of leaks I trace). The septum must sit flat and centred in the cap bore. A septum that is off-centre by more than 0.3 mm leaves a crescent gap on one side, and that gap is a direct path from headspace to atmosphere. It is also the path that produces the slow, steady drift rather than a sudden failure.
- Cap-to-vial thread or crimp (about 30%). For 11 mm crimp caps, the crimp must compress the seal to a defined height. Under-crimped caps (crimp height above spec by 0.2 mm) leak at the cap skirt. For 9 mm screw caps, the failure is under-torque: below about 0.9 N·m the PTFE-faced silicone does not fully wet the glass land.
- Through the septum itself (about 20%). This is the puncture channel that does not close. It is the one everyone suspects and the one that is often not the culprit on a first puncture, but becomes dominant by the twentieth.
- Vial neck or finish defect (about 5%). A chipped or out-of-round neck finish (GPI 9 mm or 11 mm thread) will not seal regardless of septum quality. Check the glass before you blame the consumable.
The ranking matters because the fix is different for each. If your loss is in the first two categories, no septum material change will help. If it is in the third, the septum is the whole story.
Re-seal behaviour: the puncture channel is a fatigue problem, not a hole
A needle does not punch a clean cylinder through silicone. It pushes material aside, and the elastomer recovers by elastic rebound when the needle withdraws. The recovery is never complete. Each puncture leaves a channel that is narrower than the needle but not zero, and repeated punctures at or near the same site accumulate permanent deformation. This is why a septum that seals perfectly on puncture one leaks on puncture fifteen.
What the recovery curve looks like
On a 1.5 mm thick silicone/PTFE septum with a 23-gauge needle (0.64 mm OD), the channel closes to effectively zero within about 2 seconds on the first puncture. By puncture ten, the residual channel is on the order of 0.05 mm. By puncture twenty, it is 0.1 to 0.15 mm, and at that point the leak rate through the channel alone can exceed the leak rate around the cap. The recovery is not linear; it accelerates after the material’s elastic limit is reached locally.
Two practical consequences. First, a septum rated for “50 punctures” is rated for 50 punctures at a single site only if the needle is repositioned between injections; if the autosampler hits the same point every time, the effective rating is closer to 15 to 20. Second, the re-seal is temperature-dependent. A septum held at 40 °C recovers more slowly than one at 20 °C, which is why heated autosampler trays show more loss than ambient ones on identical septa.
Pre-slit septa and the trade you are making
A pre-slit septum eliminates the puncture-recovery problem by starting with a channel. That channel is also a permanent leak path. On a pre-slit PTFE/silicone septum, the baseline evaporation rate is roughly 3 to 5 times that of an unslit septum of the same material at ambient, because the slit does not close. Pre-slit septa are the right choice when you are puncturing more than 30 times per vial and the analytes are not volatile. They are the wrong choice for a 4-hour run of a compound with a boiling point under 150 °C. If you are choosing between formats, the vial septa selection page lays out the slit and material options against these trade-offs.
Compression set is the slow killer, and it is a materials question
Compression set is the permanent deformation a elastomer retains after being compressed and released. A septum is under compression for the entire time the cap is on. Over hours and days, the silicone takes a set, and the sealing force at the cap interface drops. This is the mechanism behind the vial that was sealed on Monday and leaks by Friday, and it is invisible to any visual inspection.
The number that matters is the compression set value, expressed as a percentage of original deflection that does not recover. For a general-purpose silicone septum, compression set after 22 hours at 175 °C (ASTM D395, Method B) is typically 20 to 30%. For a higher-grade platinum-cured silicone, it is 10 to 15%. That difference translates directly into how long the cap holds torque and how much the seal force decays over a multi-day run.
Temperature rating is a compression set statement in disguise
When a vendor says a septum is rated to 200 °C, they are telling you the material will not degrade catastrophically at that temperature. They are not telling you it will still seal. Above about 120 °C, the compression set of standard silicone climbs steeply, and a septum that seals at 25 °C will show measurable leak at 150 °C after a few hours because the material has taken a permanent set and the cap no longer compresses it. If your method runs the autosampler tray heated, size the septum for the tray temperature, not the inlet temperature, and add a margin. A septum rated to 200 °C is a reasonable choice for a 150 °C tray; a septum rated to 150 °C is not.
Material choice in one table
| Septum material | Temp range (continuous) | Compression set (22 h, 175 °C) | Re-seal after 20 punctures | Best for |
|---|---|---|---|---|
| PTFE-faced silicone | -40 to 200 °C | 20 to 30% | Poor to fair | General HPLC, single-use vials |
| Platinum-cured silicone | -40 to 200 °C | 10 to 15% | Fair to good | Multi-day runs, heated trays |
| Butyl rubber | -40 to 120 °C | 15 to 25% | Good | Low-temperature, low-volatility work |
| PTFE/silicone laminated | -40 to 200 °C | 20 to 30% | Fair | Aggressive solvents, chemical inertness |
| Pre-slit silicone | -40 to 180 °C | 15 to 25% | N/A (slit) | High puncture count, non-volatile analytes |
The table is a starting point, not a specification. The compression set column is the one I check first, because it predicts the long-run behaviour better than the temperature rating does. A septum with 10% set will still be sealing when a 30% set septum has relaxed to a leak.
Measuring evaporation loss gravimetrically: the method that settles arguments
You cannot fix what you have not measured, and the measurement here is simple enough that there is no excuse for skipping it. Weigh the sealed vial, run it under your actual method conditions, weigh it again, and express the loss in milligrams per hour. The number is the leak rate, and it is comparable across lots, suppliers, and cap types.
The procedure, with the numbers that matter
- Prepare six vials per condition. Fill each with 1.0 mL of the same solvent you run (methanol and acetonitrile behave differently; use the real one). Cap with the septum and cap type under test, using a calibrated crimper or torque wrench.
- Weigh to 0.01 mg on an analytical balance. Record the tare before filling, the gross after capping, and the net fill weight. The net fill weight is your baseline.
- Run the vials under method conditions for the full run time, not a shortened version. If the method is 18 hours, run 18 hours. If the autosampler tray is heated, heat it.
- Re-weigh. The difference between the post-run gross and the pre-run gross, divided by run time, is the evaporation rate in mg/h.
- Report the mean and the RSD. An RSD above 15% across six vials means the capping is inconsistent, not that the septa are variable. Re-cap and re-run before drawing conclusions.
For a 2 mL vial with 1.0 mL of methanol at 25 °C, a well-sealed PTFE/silicone septum on a properly crimped 11 mm cap shows a loss rate of 0.02 to 0.05 mg/h. A failing lot shows 0.15 to 0.4 mg/h. That is a 5 to 10x difference, and it is unambiguous. If you are running a 12-hour method, the difference between 0.03 and 0.3 mg/h is 0.36 mg versus 3.6 mg of solvent lost per vial, which is enough to change the concentration of a low-volume sample by several percent and enough to change headspace composition for a GC method.
What the gravimetric number does not tell you
It does not tell you where the leak is. A 0.3 mg/h loss could be the cap, the septum, or the neck finish. To localise it, run a second set of vials with the septum sealed under a drop of epoxy at the cap interface (isolating the through-septum path) and a third set with the septum replaced by a solid PTFE disc (isolating the cap path). The difference between the three sets is your leak map. I have used this three-condition test to settle supplier disputes in under a day.
Two field cases where the measurement changed the decision
Case 1: the overnight drift that was compression set, not the column
Symptom: A contract lab running EPA SW-846 Method 8260 volatile organics saw internal standard responses drift down 18% over a 16-hour run. The column was replaced, the inlet liner was replaced, the purge-and-trap was serviced. No change.
Measurement: A gravimetric check on the autosampler vials showed 0.28 mg/h loss at hour 1 and 0.41 mg/h at hour 12, on the same vials. The loss rate was increasing with time, which is the signature of compression set: the seal was relaxing as the run progressed. The septa were a standard PTFE/silicone lot with a compression set of 28%.
Fix: Switched to a platinum-cured silicone septum (compression set 12%) and moved the autosampler tray from 40 °C to ambient with a cooled stack. Loss rate dropped to 0.04 mg/h and held flat over 16 hours. Drift fell to under 4%.
Case 2: the re-seal failure that looked like a coring problem
Symptom: A pharmaceutical QC lab running a 30-injection sequence on 2 mL vials saw the last five injections in each vial fail system suitability for peak area RSD (above 2.0%). The analyst assumed coring and swapped to a different needle.
Measurement: The gravimetric test on vials punctured 1, 10, 20, and 30 times showed loss rates of 0.03, 0.09, 0.19, and 0.34 mg/h respectively. The re-seal was degrading with puncture count, exactly as the recovery curve predicts. The septum was a 1.5 mm silicone with no PTFE facing, and the autosampler was hitting the same site every injection.
Fix: Two changes. First, a septum with a PTFE facing and a higher-grade silicone core, which improved re-seal at the 20-plus puncture range. Second, and more important, a needle depth adjustment that moved the puncture site 0.5 mm off-centre between injections, spreading the punctures across the septum face. Loss rate at 30 punctures fell to 0.08 mg/h. The “coring” was never coring; it was a re-seal failure that the analyst had misdiagnosed.
A troubleshooting sequence that goes from symptom to cause in four steps
When a run shows evaporation-related loss or drift, work this sequence in order. Each step narrows the leak path.
- Step 1: Weigh the vials. If the loss rate is above 0.1 mg/h on a 2 mL vial with a volatile solvent, you have a seal problem. If it is below 0.05 mg/h, the loss is not from the vial and you should look at the inlet or the transfer line. This step takes an hour and eliminates half the possible causes.
- Step 2: Check the cap torque or crimp height. For 9 mm screw caps, target 0.9 to 1.1 N·m. For 11 mm crimp caps, target a crimp height of 5.5 to 5.7 mm measured at the skirt. Out-of-spec caps are a leak path regardless of septum quality.
- Step 3: Run the three-condition leak map (epoxy-sealed septum, solid disc, normal). This tells you whether the loss is through the septum, around the cap, or at the neck.
- Step 4: If the loss is through the septum, check puncture count and temperature. Above 20 punctures per site, or a tray above 40 °C, the septum is the cause and the fix is material or geometry, not technique.
This sequence is also the one I use when qualifying a new supplier. A lot that passes steps 1 and 2 at the specified loss rate goes on the approved list; a lot that does not is rejected on a number, not an impression. The septa product pages list compression set and temperature ratings per SKU, which is what makes the qualification repeatable.
What to specify so the next lot does not surprise you
The specification that prevents evaporation loss is not “silicone septum, 11 mm.” It is a set of numbers that a supplier can test against and you can verify. Here is what I put on a purchase spec now, after too many lots that met the drawing and failed the run:
- Material and cure: platinum-cured silicone core, PTFE facing on the sample side, durometer 45 to 55 Shore A. Specify the cure; standard peroxide-cured silicone has higher compression set and more extractables.
- Compression set: not more than 15% after 22 hours at 175 °C (ASTM D395 Method B). This is the single most predictive line on the spec.
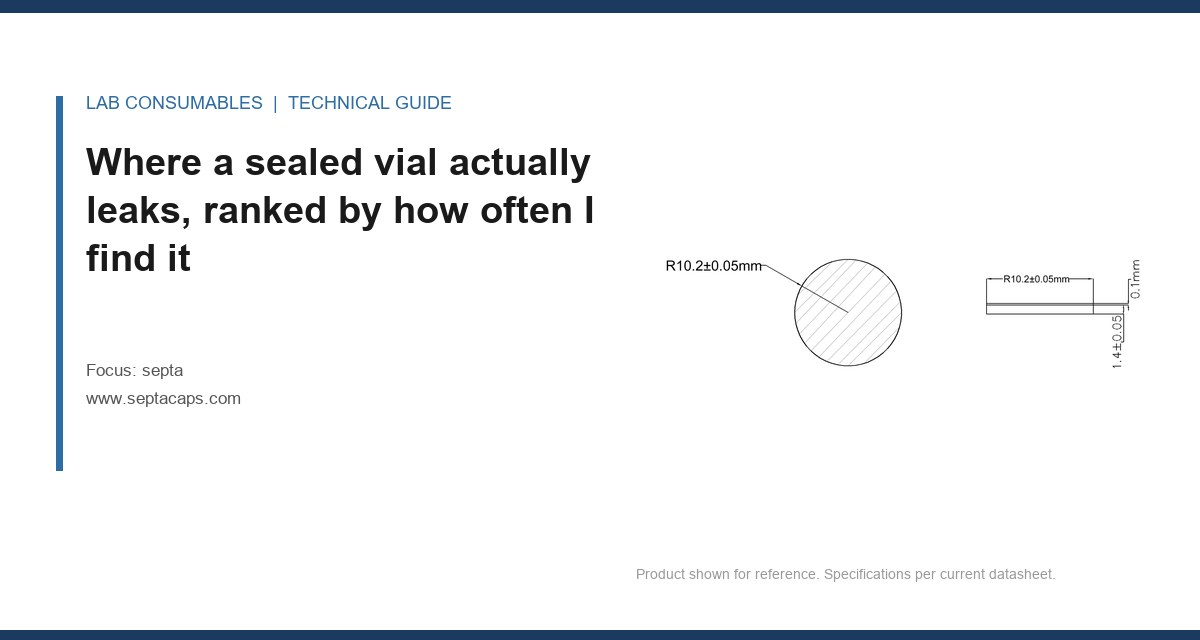
- Thickness: 1.5 mm ± 0.1 mm for 11 mm caps, 1.0 mm ± 0.1 mm for 9 mm caps. Thickness variation is a leak path because the cap cannot compensate for it.
- Re-seal rating: state the puncture count and the test method (e.g., “no loss above 0.1 mg/h after 20 punctures with a 0.64 mm needle at 25 °C”). A rating without a method is a marketing number.
- Temperature rating: continuous, not peak, and stated for the tray temperature you actually run.
- Lot-level gravimetric test: require the supplier to report evaporation rate on a sample from each lot, using the same procedure you use. If they cannot, that is your answer about whether they measured anything.
For cross-reference on cap and vial dimensions, the GPI finish standards (GPI 9 mm and 11 mm) define the neck geometry, and the HPLC vial and autosampler vial references cover the dimensional tolerances that interact with the septum. If you are running GC methods under SW-846, the EPA SW-846 test methods set the holding-time and preservation requirements that your seal has to meet, and the method’s own QA criteria are a useful back-check on whether your gravimetric loss rate is acceptable for the analytes you run. Vendor technical libraries from Agilent, Thermo Fisher, and Restek publish septum and cap compatibility data that is worth reading against your own numbers rather than in place of them.
The decision rule is this: if a sealed vial loses more than 0.1 mg/h of a volatile solvent under your actual method conditions, the septum or the cap is the cause, and you fix it by specifying compression set, thickness tolerance, and a lot-level gravimetric test, not by changing suppliers on instinct. If it loses less than 0.05 mg/h, stop looking at the septum and go find the real problem. Weigh the vials first. The number will tell you which article you needed to read.
References & further reading
Related resources from our lab consumables network:
- Septa at septacaps.com
- Vial Septa at vialsepta.com
- Hplc Vial at hplcgc.com
- Autosampler Vial at autosamplerhplc.com
External references and standards: