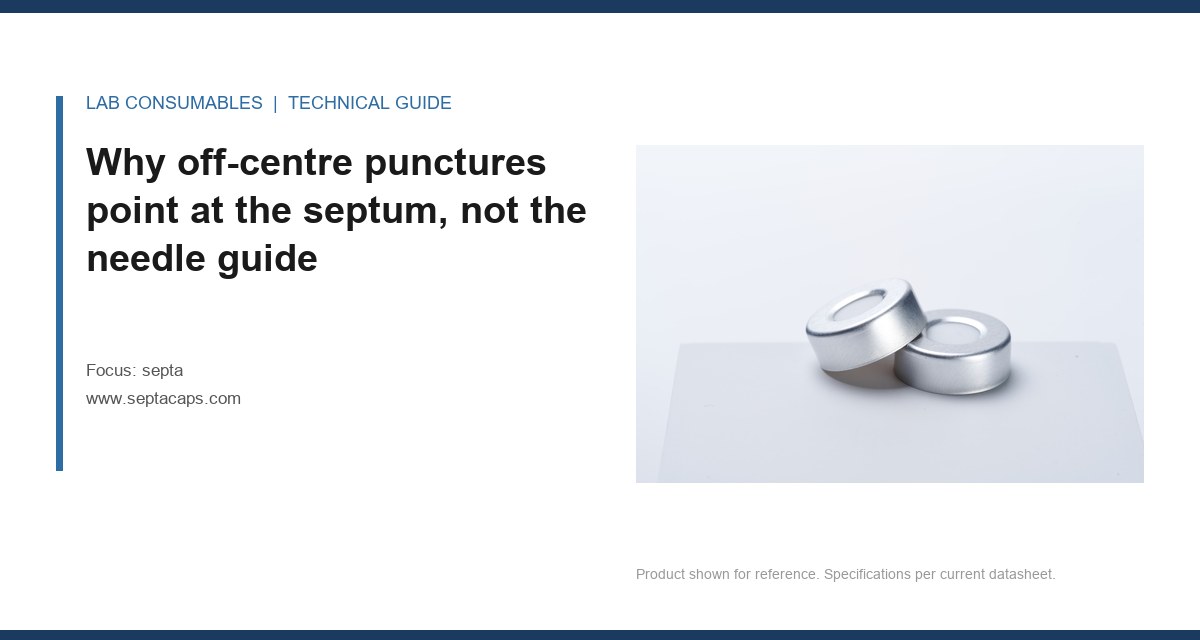
Last spring a customer sent me a photo of a syringe needle that looked like someone had put a kink in it with pliers. The bend was about 6 mm above the bevel, right where the needle passes through the vial headspace. They had already replaced the autosampler needle three times in six weeks and were convinced the instrument was at fault. I asked one question: what septa are you using? They were running a 1.5 mm thick silicone/PTFE disc that had been sitting in a warehouse for two years, and the durometer had crept up to something closer to a plug than a seal. The needle was not bending on the way in. It was bending on the way out, because the septum had closed on the shaft like a collet and the needle had nowhere to go but sideways.
That pattern repeats itself more than any other field failure I get called about. Bent needles and off-centre punctures almost never trace back to the autosampler. They trace back to the septum, the way it seats, the way it grips, and the way it fails to recover after a few hundred punctures. This piece is about how to prove that on your bench, with measurements, and what to change.
Start with the geometry. A typical autosampler vial is a 12 x 32 mm glass body with a 6 mm neck opening. The septum sits on top of the neck, held by a crimp or screw cap. The needle guide in the autosampler tower is usually a hole of 0.5 to 0.8 mm nominal diameter, and the needle itself is 0.5 mm OD for a 23-gauge or 0.41 mm for a 25-gauge. The total clearance between needle and guide is small but real. Off-centre punctures mean the needle is entering the guide cleanly and then being deflected somewhere between the guide and the vial.
The only thing in that gap is the septum and the cap. If the septum is off-centre in the cap, if the cap is not seated square on the neck, or if the septum has been deformed by previous punctures, the needle will deflect. A deflection of 0.3 mm at the guide becomes a 1 to 2 mm offset at the bottom of the vial, which is enough for the needle to scrape the inside wall of the glass, pick up a burr, and start bending on subsequent injections.
The seat matters more than the disc
I have measured this on a few hundred vials. Take a crimp cap with a septum that was installed by hand rather than by a crimper set to the right jaw depth. The septum can sit 0.2 to 0.4 mm off-centre relative to the cap bore. That doesn’t sound like much. But the cap bore is only 6 mm, and the needle guide is 0.6 mm, so the margin for error on a 32 mm tall vial is tight. A 0.3 mm offset at the cap translates to roughly 1.1 mm of lateral movement at the needle tip if the needle is not perfectly rigid. The needle is not perfectly rigid. It is a tube with a wall thickness of 0.1 mm on a 23-gauge. It flexes.
The fix here is not more needle guides. It is a properly adjusted crimper. For a standard 11 mm crimp cap, the jaw depth should be set so the cap skirt sits flush against the vial shoulder with no gap and no crushing of the septum. I use a go/no-go gauge made from a machined aluminium block, and I check the first five vials of every lot. If the cap spins freely on the neck, the crimp is loose. If the septum shows a visible ring from the jaw, the crimp is too tight and the septum is being pre-compressed.
How septum recovery behaviour bends needles
A septum is an elastomer disc with a hole punched through it every time the needle enters. The hole should close. The rate at which it closes depends on the material, the thickness, the temperature, and the number of prior punctures. This is where most people underestimate what is happening inside the cap.
Take a 1.5 mm silicone/PTFE septum at 50 Shore A, which is typical for HPLC work. First puncture: clean entry, clean exit, hole closes in under a second. Two hundredth puncture: the hole is still closing but the edges are ragged, and the PTFE facing has started to delaminate in a small ring around the puncture site. Five hundredth puncture: the silicone has taken a permanent set, the hole is 0.1 to 0.2 mm wider than the needle, and the PTFE has cracked into a star pattern. At that point the needle is no longer passing through a hole. It is coring a new one every time.
The bending happens on withdrawal. As the needle pulls out, the elastomer grips the shaft. If the hole has closed around the shaft with enough friction, the needle is held while the autosampler tower lifts. The shaft bows. If the bow exceeds the elastic limit of the stainless steel (which for 304 needle tubing at 0.1 mm wall is not a lot), the needle takes a permanent set. That is the kink at 6 mm above the bevel.
Puncture counts you can actually use
I have run enough of these to have working numbers. These are for 23-gauge needles, ambient temperature, aqueous and low-organic solvents, and a properly crimped cap:
- Silicone/PTFE, 1.5 mm, 50 Shore A: 300 to 500 punctures before recovery degrades noticeably. Replace at 300 if you are running a validated method.
- Silicone/PTFE, 1.0 mm, 45 Shore A: 200 to 350 punctures. Thinner means less material to grip the needle, but also less to seal against.
- Bonded silicone/PTFE with a laminated PTFE facing: 500 to 800 punctures. The bonded construction resists delamination, which is the failure mode that starts the coring.
- Natural rubber / butyl (GC headspace): 50 to 100 punctures. These are for a different application and should not be reused across a long sequence.
These numbers assume the septum is at room temperature. If your autosampler tray is at 4 °C, the elastomer stiffens, recovery slows, and the effective puncture count drops by roughly 30 to 40 percent. If the tray is at 40 °C for a heated headspace method, the elastomer softens and the puncture count drops for a different reason: the hole does not close cleanly, and the PTFE facing lifts. Either way, temperature is a variable most labs do not account for when they set a septum replacement interval.
A field diagnostic for bent needles and off-centre punctures
Here is the sequence I run when a customer calls with a bent needle. It takes about 20 minutes and it isolates the fault to one of four places: the septum, the cap, the crimp, or the needle guide. Do it in order. Do not skip steps because you think you know the answer.
Step 1: Look at the puncture pattern
Take ten used vials from the run that produced the bent needle. Look at the septum surface under a 10x loupe. A healthy septum shows a tight cluster of punctures within a 1 mm circle. An off-centre pattern shows punctures spread across 2 to 3 mm, often in an arc. A coring pattern shows a punched-out disc of material sitting on top of the septum or inside the vial. If you see the arc, the fault is in the cap or the seat. If you see coring, the fault is the septum material or the puncture count.
Step 2: Check the cap squareness
Put a used cap on a flat surface and look at it from the side. A crimp cap that is not square will show a visible tilt of 0.5 to 1 degree. That is enough to cause an off-centre puncture. If you are using screw caps, check the thread engagement. A 9 mm screw cap that is cross-threaded by one turn will sit 0.3 mm high on one side. I have seen this cause a 2 mm puncture offset at the bottom of the vial.
Step 3: Measure the needle guide
Take the needle guide out of the autosampler tower and measure the bore with a pin gauge. The nominal is 0.6 mm for a 23-gauge needle. If the bore has worn to 0.8 mm or more, the guide is no longer guiding. This happens after 50,000 to 100,000 injections on some autosamplers. A worn guide will produce off-centre punctures even with a perfect septum. Replace the guide and re-run the test.
Step 4: Run a dry injection test
Take ten fresh vials, fill them with water, cap them with the septa you are using, and run ten dry injections (no sample, just the needle going in and out). Then inspect the septa. If the punctures are centred and tight, the fault is not the septum or the cap. If they are off-centre, the fault is upstream of the needle. This test isolates the mechanical path from the analytical path, and it takes five minutes.
Comparison: septum specifications versus needle bending risk
This is the table I use when a lab asks me to recommend a septum for a method that is bending needles. The numbers are from my own bench work and from manufacturer datasheets, and they are for 23-gauge needles at ambient temperature.
- 1.0 mm silicone/PTFE, 45 Shore A: low grip on the needle, low bending risk, but seals only up to about 0.5 bar and is not suitable for volatile solvents. Puncture count 200 to 350.
- 1.5 mm silicone/PTFE, 50 Shore A: moderate grip, moderate bending risk, seals to 1.5 bar. Puncture count 300 to 500. This is the default for most HPLC work.
- 2.0 mm silicone/PTFE, 55 Shore A: high grip, high bending risk on 25-gauge needles, seals to 2.5 bar. Puncture count 400 to 600. Use only if you need the pressure rating.
- 1.5 mm bonded silicone/PTFE, 50 Shore A: moderate grip, low delamination risk, seals to 1.5 bar. Puncture count 500 to 800. This is what I recommend for high-throughput sequences.
- 1.5 mm PTFE-faced butyl (GC): high grip, high bending risk, seals to 3 bar. Puncture count 50 to 100. Not for autosampler HPLC work.
The pattern is clear: thicker and harder septa grip the needle more, which increases bending risk, but they seal better. The trade-off is real, and it is why a 1.5 mm bonded septum is the sweet spot for most autosampler work. It has enough material to seal, but the bonded construction means the PTFE facing does not delaminate and start coring at 300 punctures.
When to move to a pre-slit septum
If your method uses a 25-gauge needle, or if your autosampler tray is at 4 °C, a pre-slit septum is worth considering. The slit is typically 1 to 2 mm long and cut through the silicone layer but not the PTFE facing. The needle passes through the slit rather than punching a new hole, so grip on the shaft is much lower and bending risk drops significantly. The trade-off is evaporative loss: a pre-slit septum loses about 0.5 to 1 percent of a volatile sample per hour at room temperature, compared with 0.1 percent for a non-slit septum. If your run is longer than four hours and your sample is volatile, a pre-slit septum is the wrong choice.
The cap and crimp variables most labs ignore
I have already mentioned crimp squareness, but there is more. The cap itself is a variable. A 11 mm aluminium crimp cap has a skirt height of 6.0 mm nominal. If the skirt is 5.7 mm because the cap was formed on a worn die, the crimp will bottom out on the vial shoulder before the septum is compressed. The septum then sits loose, and the needle pushes it sideways on entry. I have measured caps from three suppliers and found skirt heights from 5.6 to 6.1 mm. That is a 0.5 mm spread, which is enough to cause the off-centre puncture pattern.
For screw caps, the variable is thread pitch and engagement. A 9 mm screw cap should engage 2.5 to 3 turns before it seats. If it engages in 1.5 turns, the cap is cross-threaded or the vial thread is out of spec. Both cause the septum to sit high on one side. The fix is a torque-limited capper set to 0.6 to 0.8 Nm for a 9 mm screw cap. Hand-tightening is not repeatable enough for a validated method.
GPI and ISO references
The dimensional standards matter here. A 13-425 screw thread (GPI 13-425) is the common vial septa closure for 4 mL vials, and the thread dimensions are defined in the GPI standard. A 9 mm short-thread screw cap for 2 mL HPLC vial work follows a different standard, and the two are not interchangeable. If you are buying caps and septa from different suppliers, check that both conform to the same GPI or ISO drawing. I have seen a 0.2 mm difference in thread root diameter between two “9 mm” caps from different suppliers, and that was enough to make one of them sit 0.4 mm high on the neck.
For the septa themselves, the relevant references are the dimensional tolerances in the supplier drawing (usually ±0.1 mm on diameter and ±0.05 mm on thickness for a good molded part) and the durometer specification (usually ±5 Shore A). If a supplier cannot give you those numbers in writing, you are buying a variable, not a component.
What the autosampler manufacturers actually specify
Agilent, Thermo Fisher, and the other major vendors publish recommended septum types for their autosamplers, and those recommendations are worth reading because they encode the vendor’s own field experience. Agilent’s chromatography consumables and columns documentation lists septum thickness and durometer for each autosampler model, and Thermo Fisher’s chromatography and sample handling guides do the same. The numbers are not arbitrary. They are matched to the needle guide bore and the injection force of the tower.
If you are running a method under U.S. EPA SW-846, the method itself may specify a septum type or a maximum puncture count. Read the method. I have seen labs fail an audit because they were reusing septa beyond the method’s stated limit, and the auditor caught it from the injection log. The method is the controlling document, not the vendor’s recommendation.
For general technical background on septa and needle interaction, Restek’s technical resources for chromatography are useful, particularly their notes on septa selection for GC and HPLC. They do not cover the bending failure mode in detail, but they give you the material properties you need to make the comparison.
Operational precautions that prevent the failure
Most of what I am about to list is common sense, but I have seen every one of these violated in a working lab within the last year. The list is short because the fixes are simple.
- Replace septa on a puncture count, not a calendar. If your method runs 200 injections a day, a 1.5 mm silicone/PTFE septum is done in two days. A calendar-based replacement interval of “once a week” will run it to 1,000 punctures and start coring.
- Check the crimper every lot. Use a go/no-go gauge on the first five vials of every cap lot. If the cap spins, re-crimp. If the septum shows jaw marks, back off the jaw depth by 0.1 mm.
- Do not reuse caps. A crimp cap that has been removed and re-crimped has a deformed skirt, and the septum will not seat square. The cost of a new cap is a few cents. The cost of a bent needle and a lost sequence is a few hundred dollars and half a day.
- Match the needle gauge to the septum. A 25-gauge needle in a 2.0 mm septum is asking for a bend. If you need a 25-gauge needle for low-volume injections, use a 1.0 mm or 1.5 mm septum.
- Keep the tray at a stable temperature. A tray that cycles between 4 °C and 25 °C will cause the septum to expand and contract, which loosens the cap and shifts the puncture pattern. If you need a cold tray, use a pre-slit septum and accept the evaporative loss.
- Inspect the needle guide every 20,000 injections. A worn guide is the one failure mode that looks exactly like a septum failure. Measure the bore with a pin gauge and replace at 0.8 mm.
Troubleshooting checklist
This is the checklist I leave with a lab after a site visit. It is ordered by likelihood, and each item has a specific measurement or action.
- Symptom: needle bent 5 to 10 mm above the bevel. Cause: septum gripping the shaft on withdrawal. Action: check puncture count against the table above. Replace septa at 300 punctures for 1.5 mm silicone/PTFE, or switch to a bonded septum and re-test.
- Symptom: off-centre punctures spread over 2 to 3 mm. Cause: cap not square or septum off-centre in the cap. Action: check crimp with a go/no-go gauge, replace the crimper jaw if worn, and check cap skirt height (6.0 mm ±0.1 mm for 11 mm crimp).
- Symptom: coring (punched-out discs in the vial). Cause: septum material has taken a set or the PTFE facing has delaminated. Action: replace septa, switch to a bonded construction, and check that the needle bevel is not damaged (a damaged bevel will core any septum).
- Symptom: intermittent bent needles on the same vial position. Cause: vial not seated in the tray, or tray position out of alignment. Action: check tray alignment with a vial gauge, and check that the vial is fully seated (it should not rock).
- Symptom: bent needles on all positions after a septum lot change. Cause: septum thickness or durometer out of spec. Action: measure thickness with a micrometer (±0.05 mm tolerance) and durometer with a Shore A gauge (±5). If out of spec, reject the lot.
- Symptom: bent needles after a needle guide change. Cause: guide bore too small or guide not seated. Action: measure bore with a pin gauge (0.6 mm nominal for 23-gauge) and check guide seating torque (typically 0.3 to 0.5 Nm).
Recommendation
For a standard HPLC autosampler running a 23-gauge needle at ambient temperature, I recommend a 1.5 mm bonded silicone/PTFE septum, 50 Shore A, with a 11 mm crimp cap set to a skirt height of 6.0 mm ±0.1 mm. Replace the septum at 300 punctures if the method is validated, or 500 punctures if it is not. Check the crimper with a go/no-go gauge on every cap lot. Inspect the needle guide every 20,000 injections and replace at 0.8 mm bore. If you are running a 25-gauge needle or a cold tray, move to a 1.0 mm septum or a pre-slit septum and accept the trade-off in evaporative loss.
If you are sourcing septa and caps together, buy them as a matched set from one supplier so the dimensional tolerances are consistent. The septa and cap interface is where the bending happens, and mixing suppliers is the fastest way to introduce a 0.3 mm offset you will spend weeks chasing.
The takeaway is simple. A bent needle is a symptom, not a fault. The fault is almost always in the septum, the cap, or the crimp, and it is measurable. Look at the puncture pattern, measure the cap squareness, check the puncture count against the material spec, and you will find the cause in under an hour. Replace the septum on a puncture count, not a calendar, and the bent needles stop.
References & further reading
Related resources from our lab consumables network:
- Septa at septacaps.com
- Vial Septa at vialsepta.com
- Hplc Vial at hplcgc.com
- Autosampler Vial at autosamplerhplc.com
External references and standards: